Difference between revisions of "iPhone Configuration"
From HE FAQ
(→Select the IMAP button at top, then enter the following information) |
|||
| Line 39: | Line 39: | ||
Incoming Mail Server | Incoming Mail Server | ||
| − | * Host Name: | + | * Host Name: your_domain.com |
* User Name: Your email address. | * User Name: Your email address. | ||
* Password: Your email password. | * Password: Your email password. | ||
| Line 52: | Line 52: | ||
Outgoing Mail Server | Outgoing Mail Server | ||
| − | * Host Name: | + | * Host Name: your_domain.com |
{| width="50%" | {| width="50%" | ||
Revision as of 14:54, 18 May 2010
Contents
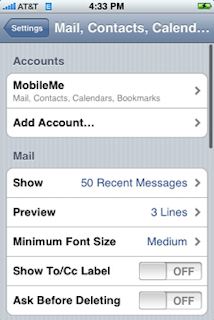
- 1 Select Add Account from the Mail Settings Menu
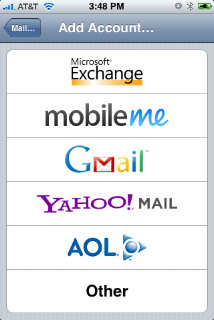
- 2 Select Other
- 3 Enter your basic account information
- 4 Select the IMAP button at top, then enter the following information
- 5 From the Mail menu, go back into your settings for this account
- 6 Select SMTP and enter 587 in the Server Port field
- 7 From the previous menu, go to Advanced
Select Add Account from the Mail Settings Menu
|
Select Other
|
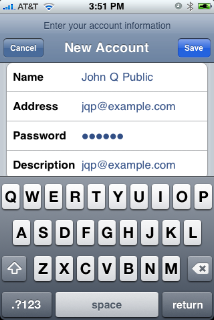
Enter your basic account information
- Name: Your name.
- Address: Your email address.
- Password: Your email password.
- Description: Description of the mail address. You can put anything in this field ("HE Email" as an example).
|
Then select Save.
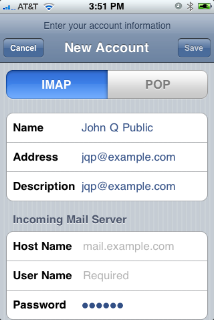
Select the IMAP button at top, then enter the following information
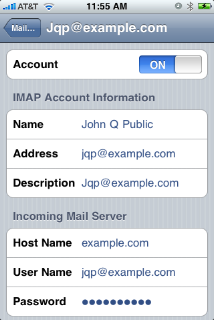
Incoming Mail Server
- Host Name: your_domain.com
- User Name: Your email address.
- Password: Your email password.
|
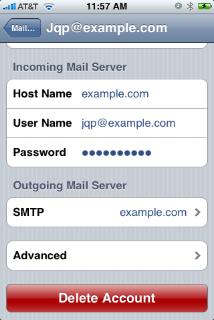
Outgoing Mail Server
- Host Name: your_domain.com
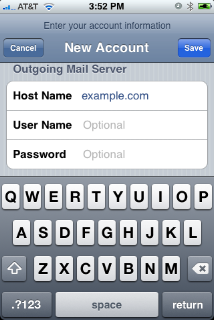
|
Then select Save.
- Make sure that it is turned on.
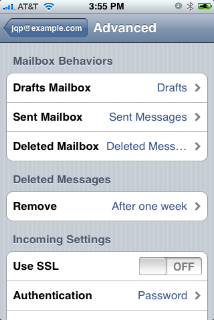
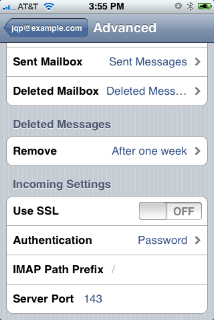
- Your settings should be similar to the following images.
|
|
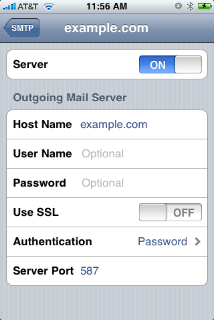
Select SMTP and enter 587 in the Server Port field
|
It should look similar to the following images. Be sure that Use SSL is set to off and the Server Port under Incoming Settings is listed as 143.
|
|
You should now be able to send and receive mail with your iPhone.