Difference between revisions of "iPhone Configuration"
From HE FAQ
(Added iPad modification) |
|||
| Line 62: | Line 62: | ||
|} | |} | ||
| − | Then select '''''Save'''''. | + | Then select '''''Save'''''. ''Note'': The iPad doesn't have this option, just "Next". You have to choose that, then wait for it to time out. This can take several minutes. It should come back saying "Cannot Connect using SSL. Do you want to try setting up the account without SSL?" Select "Yes." |
=== From the Mail menu, go back into your settings for this account === | === From the Mail menu, go back into your settings for this account === | ||
Revision as of 16:04, 23 April 2012
This information only pertains to Hurricane Electric's Shared Web Hosting package. There may be different information in our other categories.
Contents
- 1 Select Add Account from the Mail Settings Menu
- 2 Select Other
- 3 Enter your basic account information
- 4 Select the IMAP button at top, then enter the following information
- 5 From the Mail menu, go back into your settings for this account
- 6 Select SMTP and enter 587 in the Server Port field
- 7 From the previous menu, go to Advanced
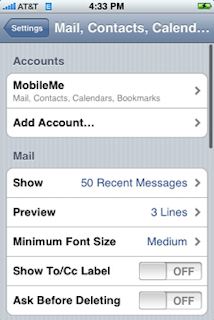
Select Add Account from the Mail Settings Menu
|
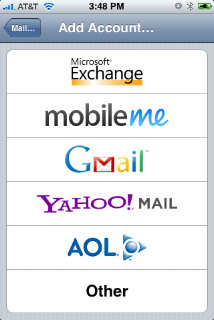
Select Other
|
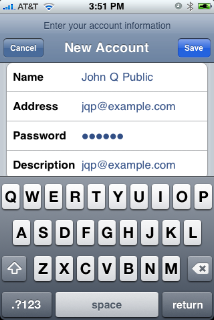
Enter your basic account information
- Name: Your name.
- Address: Your email address.
- Password: Your email password.
- Description: Description of the mail address. You can put anything in this field ("HE Email" as an example).
|
Then select Save.
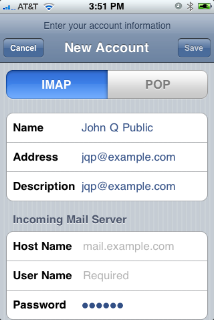
Select the IMAP button at top, then enter the following information
Incoming Mail Server
- Host Name: your_domain.com
- User Name: Your email address.
- Password: Your email password.
|
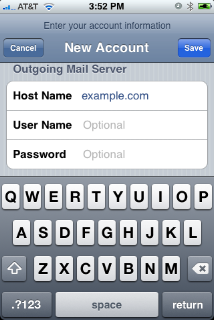
Outgoing Mail Server
- Host Name: your_domain.com
|
Then select Save. Note: The iPad doesn't have this option, just "Next". You have to choose that, then wait for it to time out. This can take several minutes. It should come back saying "Cannot Connect using SSL. Do you want to try setting up the account without SSL?" Select "Yes."
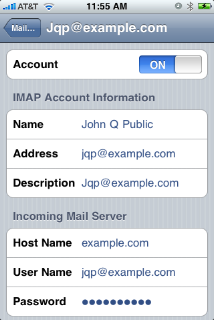
- Make sure that it is turned on.
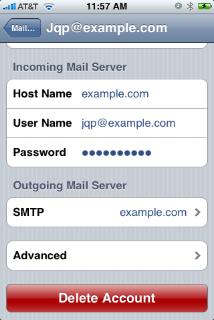
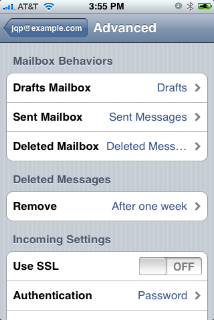
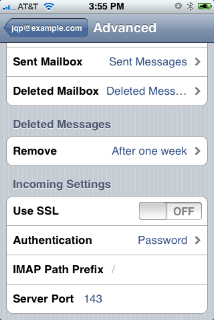
- Your settings should be similar to the following images.
|
|
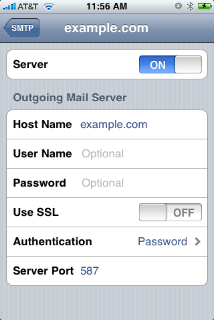
Select SMTP and enter 587 in the Server Port field
|
It should look similar to the following images. Be sure that Use SSL is set to off and the Server Port under Incoming Settings is listed as 143.
|
|
You should now be able to send and receive mail with your iPhone.